Categories
Explained

NYC 10: A Guide To Taxis

This month marks 10 years since we moved to New York City. I’m writing on a variety of topics to reflect on a decade in one of the best cities in the world. Read all the posts.

First. Find a corner where no one else is looking for a taxi. You don’t want to be that asshole that stands in front of someone who’s been trying desperately to hail a cab for ages, as they will complain about you for hours. Hours. If you’re feeling charitable, walk with traffic for a block before attempting to hail.

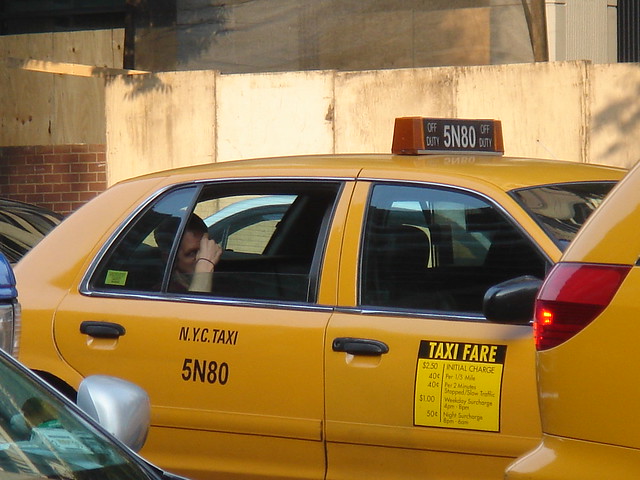
Second. Look for an available cab. Stare at the medallion number on top of the cab. If it is lit up, it is available; if it is not lit up, it is not available. Use this information to guide you in the next section.

Third. As an available cab becomes visible, or if a large swarm of traffic comes your way, put your arm that is closest to the street up at a 45-degree angle. (There is no specific thing you need to do with your hand, but I like a two-finger point, myself.) If no cab stops and no other cabs are visible, you may drop your hand until the next wave of traffic comes – although if you see someone else lurking for a cab, you may wish to continue the Hailing Gesture to indicate that this territory is yours and they need to go elsewhere, lest you complain about them for hours.

Fourth. When a cab does stop, quickly enter it. Do not ask the cabbie through the window if he will take you somewhere, because if you have to ask, he will immediately say no and drive off, which is legal because you didn’t get in the cab before telling him you wanted to go to Queens. If you have a suitcase or luggage, the driver may pop the trunk for you. (Note that if you have luggage and you aren’t going to the airport, they will grumble.) Do not get in a black towncar or a gypsy cab if they attempt to pick you up, as that’s illegal. If a pedi-cab (those guys on bicycles) try to pick you up, scoff loud enough for them to hear you.

Fifth. Now inside the taxi, indicate clearly to your driver where you wish to go. Unless you are going to a major landmark, give a cross-street. Do not give building numbers as it doesn’t help. Enunciate clearly all numbers, indicate what type of street it is, and repeat any multi-digit street numbers using just digits, so as to avoid confusion between similar sounding numbers. And be polite.

BAD INSTRUCTIONS: “51st and Lex.”
GOOD INSTRUCTIONS: “Fifty first Street and Lexington Avenue, please. Five one.”

Sixth. Tap the Taxi TV screen in the lower right corner to turn it off. Do not sit and watch Sandy Kenyon’s terrible movie reviews. Don’t worry, the screen will turn back on at the end if you’re paying credit.

Seventh. Relax, but retain a general sense of where you’re supposed to be going and where you are actually going. Traffic, street fairs, accidents, and that weird things where all the cops park on the same street at once (seriously, what is up with that?) may cause your cabbie to redirect. This is natural; going twenty blocks the wrong direction is not. If you detect the driver is going too far the wrong way, provide helpful feedback, such as: “Hey, buddy, are we going the right way? I said (repeat destination clearly).” If you are not familiar with the city geographic, you can turn the Taxi TV back on and put it on GPS mode.

Eighth. You have arrived! Pay the driver. Cash is king, but credit cards are accepted in all cabs. Tip nicely (at least 20%) because driving a taxi is not the easiest way to make a living. Get out on the side closest to the curb. If someone nearby was waiting for a cab, hold the door for them as they get in and close it behind them for an extra touch of class.

And that is how you take a taxi.

Categories
Explained

Enabling Data Protection in iOS 4

For all of my friends and readers with existing iPhone/iPod Touch hardware, today is an exciting day: iOS 4 is now available via iTunes. But before you go rushing to update your phone, let me give you one small piece of advice:
Apple has done a great job bringing some of the enterprise security features (complex passcodes, wipe on 10 failures, etc) to regular users as part of the upgrade. One of the new features in iOS 4 that has been underreported on is called “Data Protection“. From my understanding, Data Protection is meant to correct some of the issues with the original hardware encryption method introduced last year on the 3GS and 3rd Gen iPod Touch. It also provides developers with better APIs for encrypting your data, so that if you’re carrying around your financial data or health information, you can get an additional level of security. Additionally, there’s no discernible performance hit.
Sounds great, right? There’s a tiny catch: if you’re upgrading from iOS 3, the filesystem needs to be rebuilt from scratch to enable this feature. So if you have an iPhone 3GS or iPod Touch 3rd Gen, you need to do a backup-factory restore-data restore installation of iOS 4. To break this into discrete steps:

  1. Plug in your iPhone.
  2. Let it backup through iTunes.
  3. Rather than clicking “Upgrade”, click “Restore”.
  4. Let iTunes download the installer and do a complete restore.
  5. When the installation is done, iTunes will prompt you about restoring from the backup you just took. Do so.
  6. Wait the somewhat lengthy amount of time as all your data is put back onto your phone.

You can confirm this has been done by going to Preferences -> General -> Passcode Lock and scrolling to the very bottom, where you should see “Data Protection is enabled.”
That’s it. You will need to set a passcode to get the benefit of this (but you should have that anyhow); iPhone 4 users will automatically have this out of the box. You are certainly allowed to just do a regular upgrade, but you won’t get data protection (and if you’re in an enterprise, know that configuration profiles can check against this as a pre-requisite.) And for those on earlier hardware – sorry, you lack the hardware chip to do the encryption.
Developers who are interested in the technical details or in leveraging Data Protection should check out Session 209, “Securing Application Data”, in the WWDC 10 videos.
Enjoy the upgrade.

Categories
Explained

Quicksilver Trick: Strip Clipboard Formatting

It’s been a while since I did a Quicksilver one-off, but with all the [recent](http://lifehacker.com/software/quicksilver/hack-attack-a-beginners-guide-to-quicksilver-247129.php) [crazy](http://www.43folders.com/2007/03/05/tms-comma-trick/) [hype](http://www.lifehacker.com/software/quicksilver/hack-attack-the-quicksilver-video-extravaganza-250949.php) for QS beginning once again, it seems like a good time. Plus, this literally just happened.

Do you know what my biggest pet peeve in OS X has been? It’s that it’s too smart for it’s own good.

Let me be more specific: when you copy something to the clipboard, it almost always holds the rich text formatting of the app you copied it from. If you paste it into another rich text app, you end up with something that looks like this:

This, undeniably, **sucks**. Yes, there are a few times where you want the format to copy, but this is rarely the case with most apps. I’d say maybe 5% of the time this is useful, and 95% of the time it makes me want to snap my MacBook Pro in half.

My solution to date has always been “copy from source app, paste into TextMate, copy back out of TextMate, paste into target”. I love TextMate, but this is needless abuse of a lovely app.

Was talking to Mikey (he of [Think](http://www.freeverse.com/think/)) this morning, and he explained the issue thusly:

>”It’s a side effect of copying rich text to the pasteboard server. The app copying it doesn’t know you’re going to take it to another app, and the other app doesn’t know where it came from – just that it’s on the pb.”

And then he threw out *his* solution to the problem:

$ pbpaste | pbcopy

And I thought, “well, I could alias that I guess, but then I’ve gotta keep jumping into terminal and typing. And I really want a hotkey for this. You know, like a QS trig…”

Oh. Right.

So, friends, if you too are affected by the horribly crippling brilliance of OS X’s rich text pasteboard, simply make the trigger shown at right. If you don’t know how to do this:

1. Invoke QS.
2. Type Command-‘ (that’s a single quote) to go to the Trigger preferences.
3. Create a new trigger by clicking the + button.
4. When the trigger pane drops down, press the period key to enter text mode.
5. Type “pbpaste | pbcopy” into the text field. (Or, for the slightly meta, you can copy and paste it from this post.)
6. Press tab – select “Run Command in Shell” as the action if it’s not already selected.
7. Save the trigger and then assign a hotkey as normal.

I bound mine to Shift-Option-Command-V, since I’ll tend to hit it right before I paste something out. You can choose whatever you find most comfortable.
In case it’s not clear, this takes the contents of your clipboard and pastes them right back into the clipboard. Because this is being run as a shell command, the formatting falls right off.

If you’re entirely unfamiliar with triggers, you might be in need of a read of my [trigger tutorial](https://vjarmy.com/archives/2006/01/quicksilver_gold_trigger.php).

Thanks again to [Mikey](http://www.mikey-san.net/) for his help in turning the lightbulb on over my head.

FIRST EDIT: I’ve been reminded (thanks, Suw!) that you need to have the Terminal Plugin installed to have access to the Run Command In Shell action. Also, note that this trigger does *not* paste for you; it merely strips off formatting while still in the clipboard.